
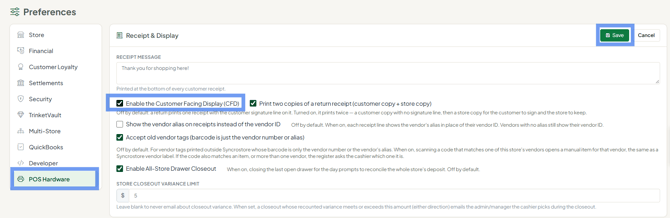
You can show your own promotional images on the customer-facing display. Go to Settings > Store settings, open the POS Hardware tab, add up to 12 images under Customer Display Slideshow, then click Edit and choose when the slideshow plays: full screen between sales, on the left half during a sale, or both.
Who this is for
Store admins setting up the customer display at the register.
Before you start
- The customer-facing display must be turned on: in Settings > Store settings, POS Hardware tab, Receipt & Display, tick Enable the Customer Facing Display (CFD). See How do I turn on tips and the customer-facing display?
- Have your images ready as PNG, JPEG, GIF or WebP files.
Step 1: Add your images
- Go to Settings > Store settings and open the POS Hardware tab.
- Scroll to Customer Display Slideshow.
- Click Choose files and pick one or more images. You can select several at once.
- Click Add Slides. The count next to the button shows how many you have, up to 12.
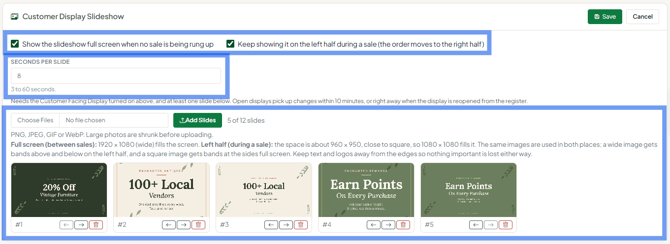
Images are saved as soon as you add them. You don't need to click Save for this part.
Step 2: Turn the slideshow on
- In Customer Display Slideshow, click Edit.
- Tick when to show it:
- Show the slideshow full screen when no sale is being rung up: the images fill the customer screen between customers.
- Keep showing it on the left half during a sale: the images keep playing on the left and the order moves to the right half of the screen.
- Set Seconds Per Slide (3 to 60).
- Click Save.

Step 3: See it on the register
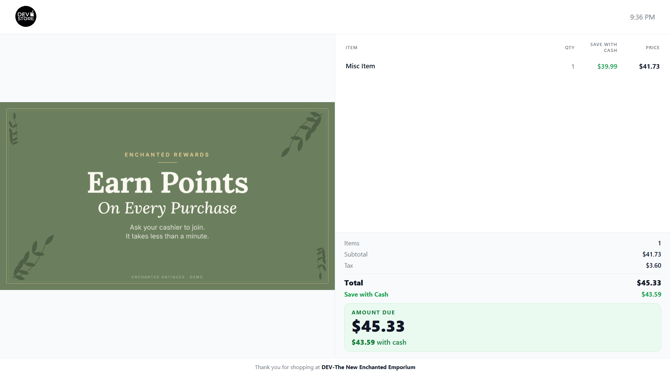
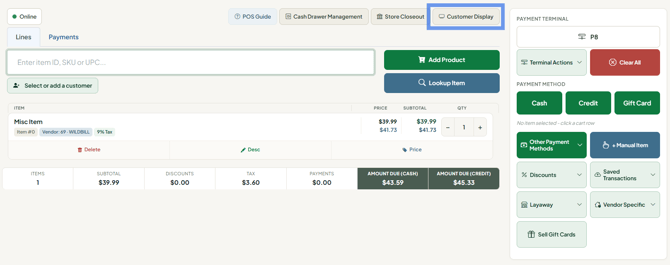
A customer display that's already open picks up the change within 10 minutes. To see it right away, click Customer Display on the register to reopen it.
Change the order or remove a slide
- Use the left and right arrows under a slide to move it earlier or later. Slides play in the order shown (#1 first).
- Click the trash can under a slide to remove it.
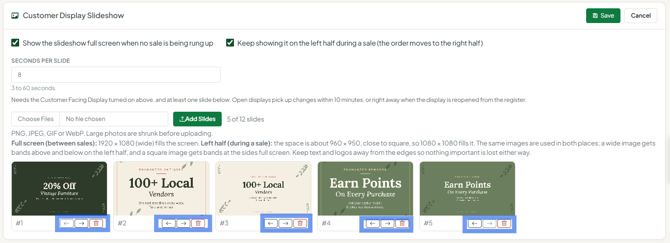
Both changes take effect immediately.
Image sizes
| Where it shows | Best size |
|---|---|
| Full screen, between sales | 1920 x 1080 (wide) |
| Left half, during a sale | 1080 x 1080 (square) |
The same images play in both places. A wide image gets bands above and below on the left half, and a square image gets bands at the sides full screen. Images are never cropped, so keep text and logos away from the edges and they'll look right either way.
- Each image can be up to 3 MB. Large photos are shrunk automatically before they upload.
- GIFs aren't shrunk, so keep them under 3 MB.
Example slides
Here are three example slides, each made in both sizes. The square version is for the left half during a sale, and the wide version is for full screen between sales. Notice the text sits in the middle, away from the edges, so it reads well either way.
A sale or promotion


Your store


Your rewards program


Tip: if you only make one version, make it square with the text in the middle. It fills the left half during a sale and shows with bands at the sides full screen.
Troubleshooting
- "You have slides, but the slideshow is turned off": click Edit, tick at least one of the two options and click Save.
- Slides don't show on the customer screen: check that the customer-facing display is turned on, that at least one slide is added and one option is ticked, then click Customer Display on the register to reopen it.
- "Image is too large": each image must be 3 MB or less. Save it smaller, or as a JPEG, and try again.
- "is not a PNG, JPEG, GIF or WebP image": the file is another type, like HEIC from an iPhone or a PDF. Save it as a JPEG or PNG first.
- "You already have 12 slides": remove one before adding another.
- "The slideshow is not set up for this store's database yet": contact Syncrostore support.
