
Click the booth on Store Management > Store map, choose the Vendor, enter Rent ($) and the dates in the Selected element panel, and click Save. Or open the vendor from People > Vendors, go to the Spaces tab and use Assign a vacant space. The rent you set is used each time you post rent.
Who this is for: Store admins and managers.
These steps use the New Experience. If your menu looks different, click Switch to New Experience at the top of the page.
From the store map
- Go to Store Management > Store map (or Store Management > Overview and click Open store map). The map opens on a classic page.
- Click the booth. To find it, type in Find vendor or booth…, turn on Vacant only to fade occupied booths, or click List and click its row.
- In the Selected element panel, fill in:
- Label - the booth number.
- Vendor - the vendor renting the booth. Choose — Vacant — to empty it.
- Rent ($) - the monthly rent.
- Move-in date - filled with today when you pick a vendor. Change it to the day they really moved in. The rent run offers to prorate a move-in after the 1st.
- Move-out date - the day they leave, if known.
- Notice to vacate given - tick it when the vendor has given notice.
- Notes - anything about this booth.
- Width (ft) and Length (ft) - the booth's size.
- Click Save.
The vendor's name under Vendor is a link that opens their vendor record in a new tab, so your unsaved map changes stay put. Past tenants lists who had the booth before.
From the vendor's page
- Go to People > Vendors and click View on the vendor's row.
- Open the Spaces tab.
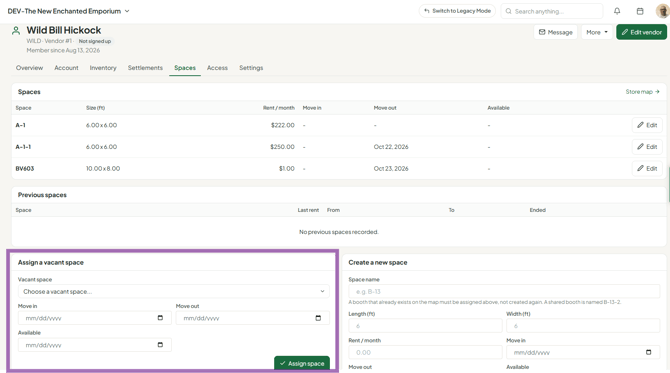
- Under Assign a vacant space, pick the space and enter the Move in, Move out and Available dates as needed, then click Assign space.
- To change rent or other details on a space they already have, click Edit on it. The classic Space Details editor opens in a dialog. Change the fields and click Save.
- Only use Create a new space for a booth that doesn't exist yet (fill in Space name, Length (ft), Width (ft), Rent / month and dates, then Create space). An existing booth must be assigned, not created again.
Moving vendors in and out
- Move-in: assign the vendor only from their actual start, and set the Move-in date to that day. If a booth is assigned earlier, rent can be charged for months before they arrived - fix with a credit on Money > Rent & fees (Credits & fees tab).
- Move-out: enter the Move-out date. The vendor is moved out of the booth automatically the morning after that date. Picking a new vendor (or — Vacant —) clears the old move-out date and notice.
- Upcoming move-outs: click the Move-outs · 30 days figure at the top of the store map. Pick a later date to delay a move-out, or clear the date to cancel it, then click Save. Open shows the booth on the map.
- BY HAND: a move-out date set before automatic move-outs started is marked BY HAND (on the vendor's Spaces tab: Move out by hand). That vendor isn't moved out on their own. Clear the Vendor when they leave, or change the move-out date to have it done for you.
Troubleshooting
- Save fails with "Booth ... already exists": that booth is already on the map. Assign the vendor to the existing booth. For a shared booth, name the second one like B-13-2.
- "vendor(s) are assigned to more than one booth": check the booths in List before saving. Each booth bills its own rent.
- I can't change the Move-in date: the booth is vacant. Choose a Vendor first.
- Rent is $0 or missing for a vendor: make sure the vendor is assigned to a booth with a Rent ($) amount.
